Build Your First Chatbot
Let's begin our journey into LazyLLM with a classic chatbot.
Through this section, you will learn about the following key points of LazyLLM
- Use TrainableModule and OnlineChatModule to enable both offline and online model deployment.
- Utilize WebModule to launch a web-based client interface.
- How to specify a model;
- How to set up history.
Build a Chatbot in Three Lines of Code
Question: How many steps does it take to build a chatbot with LazyLLM?
Answer: Three steps!
- Import
lazyllm; - Specify the model to be used;
- Start the client.
Here's the effect:
Yes, it's that simple! Below are the three lines of code to build the chatbot:
import lazyllm
chat = lazyllm.TrainableModule('internlm2-chat-7b')
lazyllm.WebModule(chat, port=23466).start().wait()
Let's delve into the details.
Specifying the Model
1. Local Model
- TrainableModule is a core module of LazyLLM, which is very powerful and capable of pre-training, fine-tuning, and model deployment. Here we are only concerned with its deployment capabilities. At least one model name must be specified when using it.
internlm2-chat-7bis the model we are using in this example. There are three ways to specify a model in LazyLLM:- Specify the exact model name (e.g., 'internlm2-chat-7b' here): LazyLLM will automatically download the model from the internet;
- Specify the exact model name (e.g., 'internlm2-chat-7b') + set the environment variable
export LAZYLLM_MODEL_PATH="/path/to/modelzoo": LazyLLM will then find the model atpath/to/modelazoo/internlm2-chat-7b/; - Use the absolute path of the model directly:
path/to/modelazoo/internlm2-chat-7b.
2. Online Model
source: Specifies the source platform of the model. Supported options includeopenai,sensenova,glm,kimi,qwen, anddoubao, among others.model: Specifies the model to be accessed.
⚠️ When using Doubao, you must provide the model ID or endpoint ID. Refer to the platform documentation on how to obtain the inference endpoint. Make sure the corresponding service is activated on the Doubao platform before using the model.
Default model mappings by platform are as follows:
- openai →
gpt-3.5-turbo - sensenova →
SenseChat-5 - glm →
glm-4 - kimi →
moonshot-v1-8k - qwen →
qwen-plus - doubao →
mistral-7b-instruct-v0.2
❗ Note: When using online models, an API_KEY must be configured. For details, please refer to the LazyLLM Official Documentation (Supported Platforms).
Starting the Model
- WebModule is another core module of LazyLLM, which can wrap any callable into a client. The wrapping effect is as shown at the beginning. The callable is passed as the first argument, here we are wrapping our deployable model chat with a client shell.
portis used to specify the port for client publishing. Theportcan be omitted; if not specified, LazyLLM will find an unused port between 20500 and 20799 to use. We can also specify a range of available ports.startis crucial in LazyLLM, which means to initiate. Ifstartis executed, it will run the deployment of all modules throughout the entire application. Here, TrainableModule and WebModule will deploy aninternlm2-chat-7bmodel and start a web client.waitis used to keep the client running after it starts without shutting down.
After deployment and client startup, LazyLLM will print the accessible URL in the terminal.
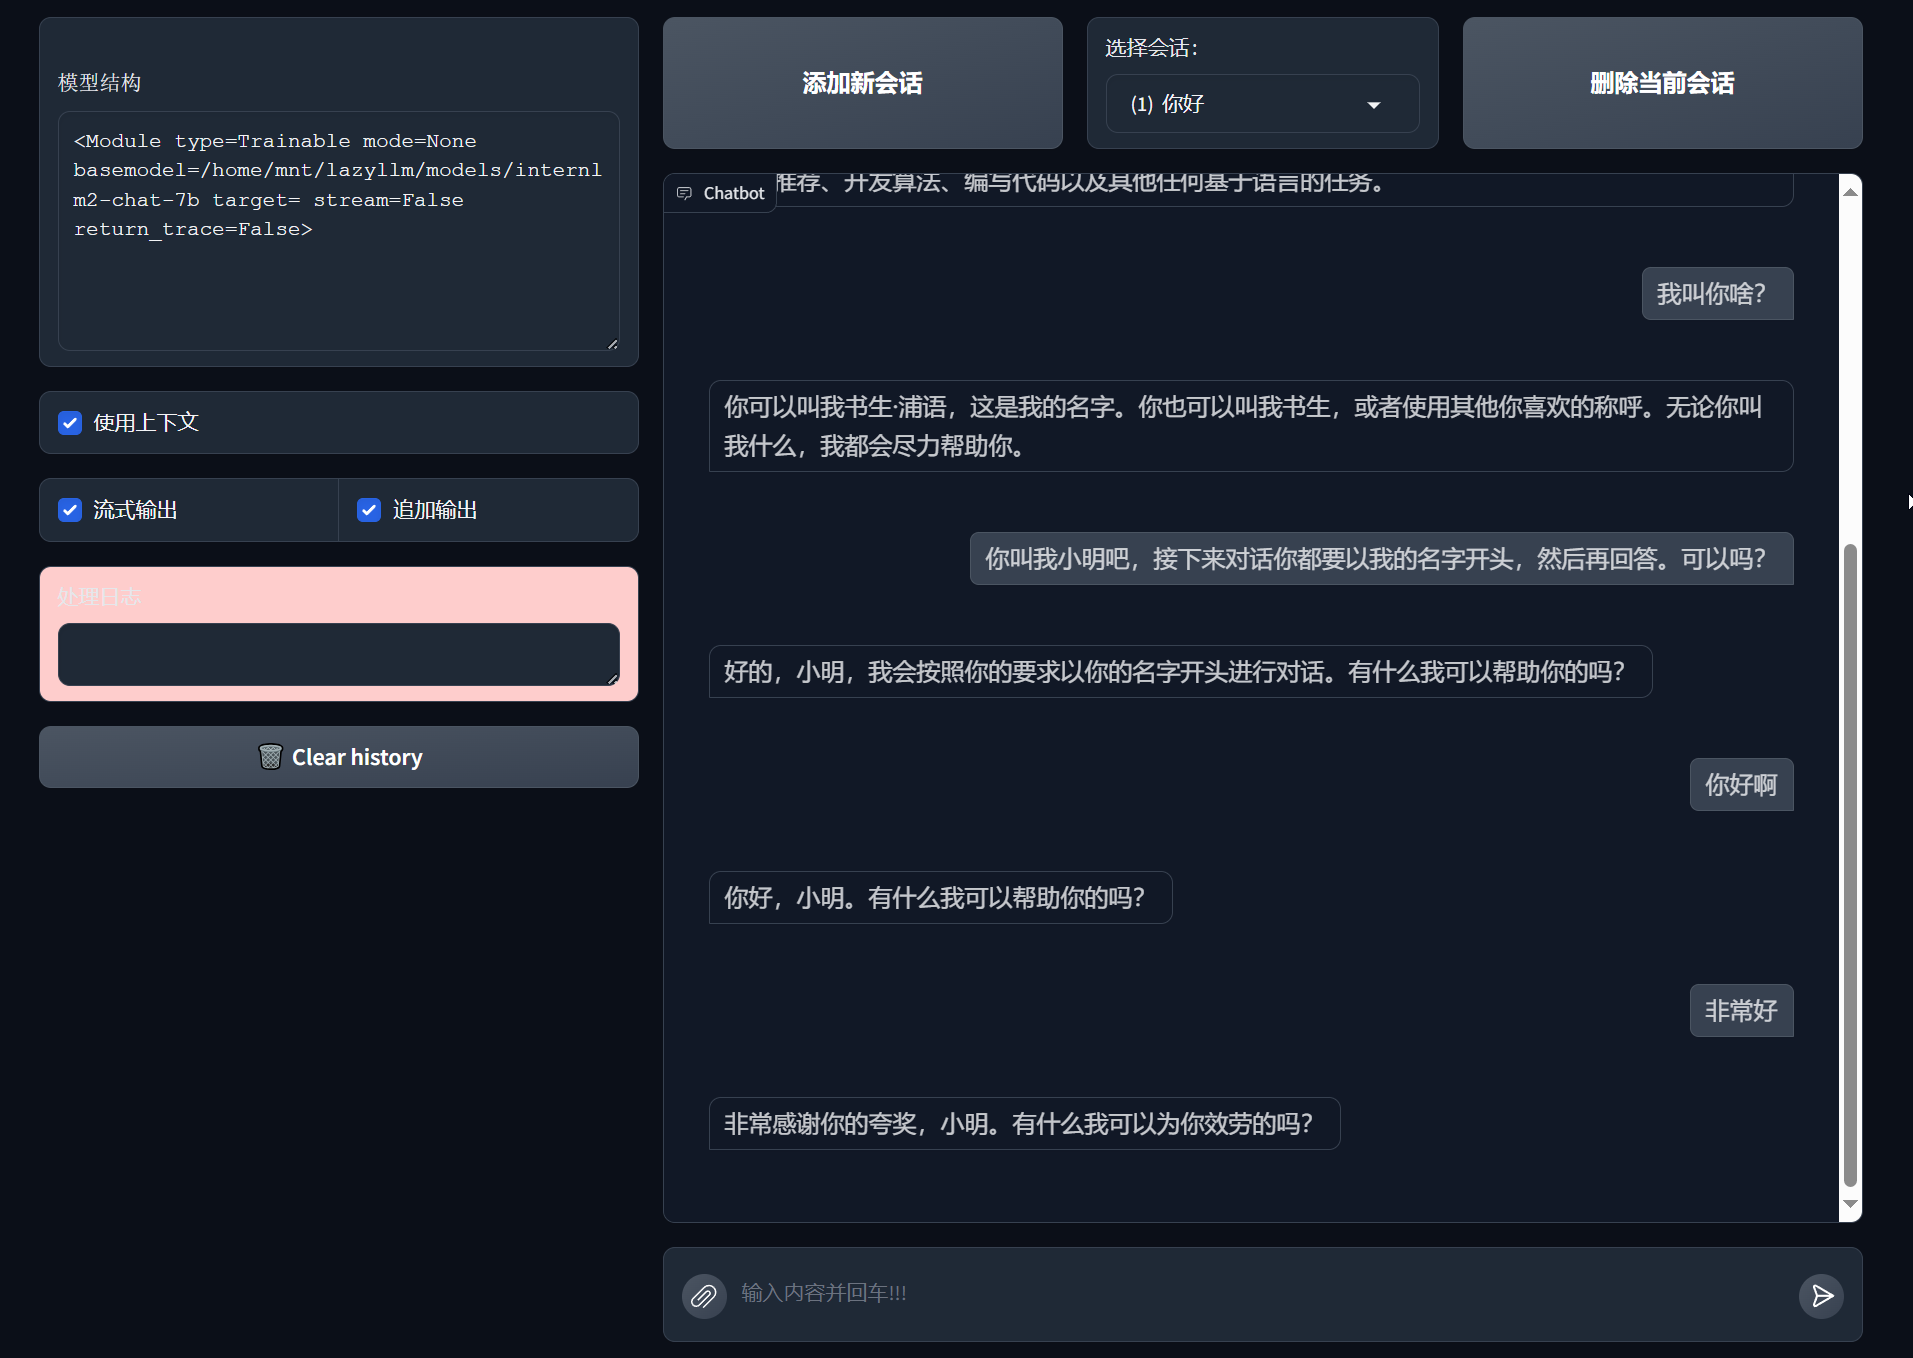
Multiround Dialogue Chatbot
Astute readers may have noticed that the chatbot in the demo image above has memory capabilities; it can engage in multiround dialogues. Now let's modify the single-turn dialogue bot from the previous section to enable it for multiround dialogues.
Specifying history
Modify the WebModule by specifying the history parameter as follows:
import lazyllm
chat = lazyllm.TrainableModule('internlm2-chat-7b')
lazyllm.WebModule(chat, port=23466, history=[chat]).start().wait()
history is a memory list that specifies to whom the context is passed. Here, it is passed to chat.
Enabling Context Usage
Specifying history is the first step to enabling context. To ensure the memory function is activated, you must also enable the context feature when using the client, as shown below:
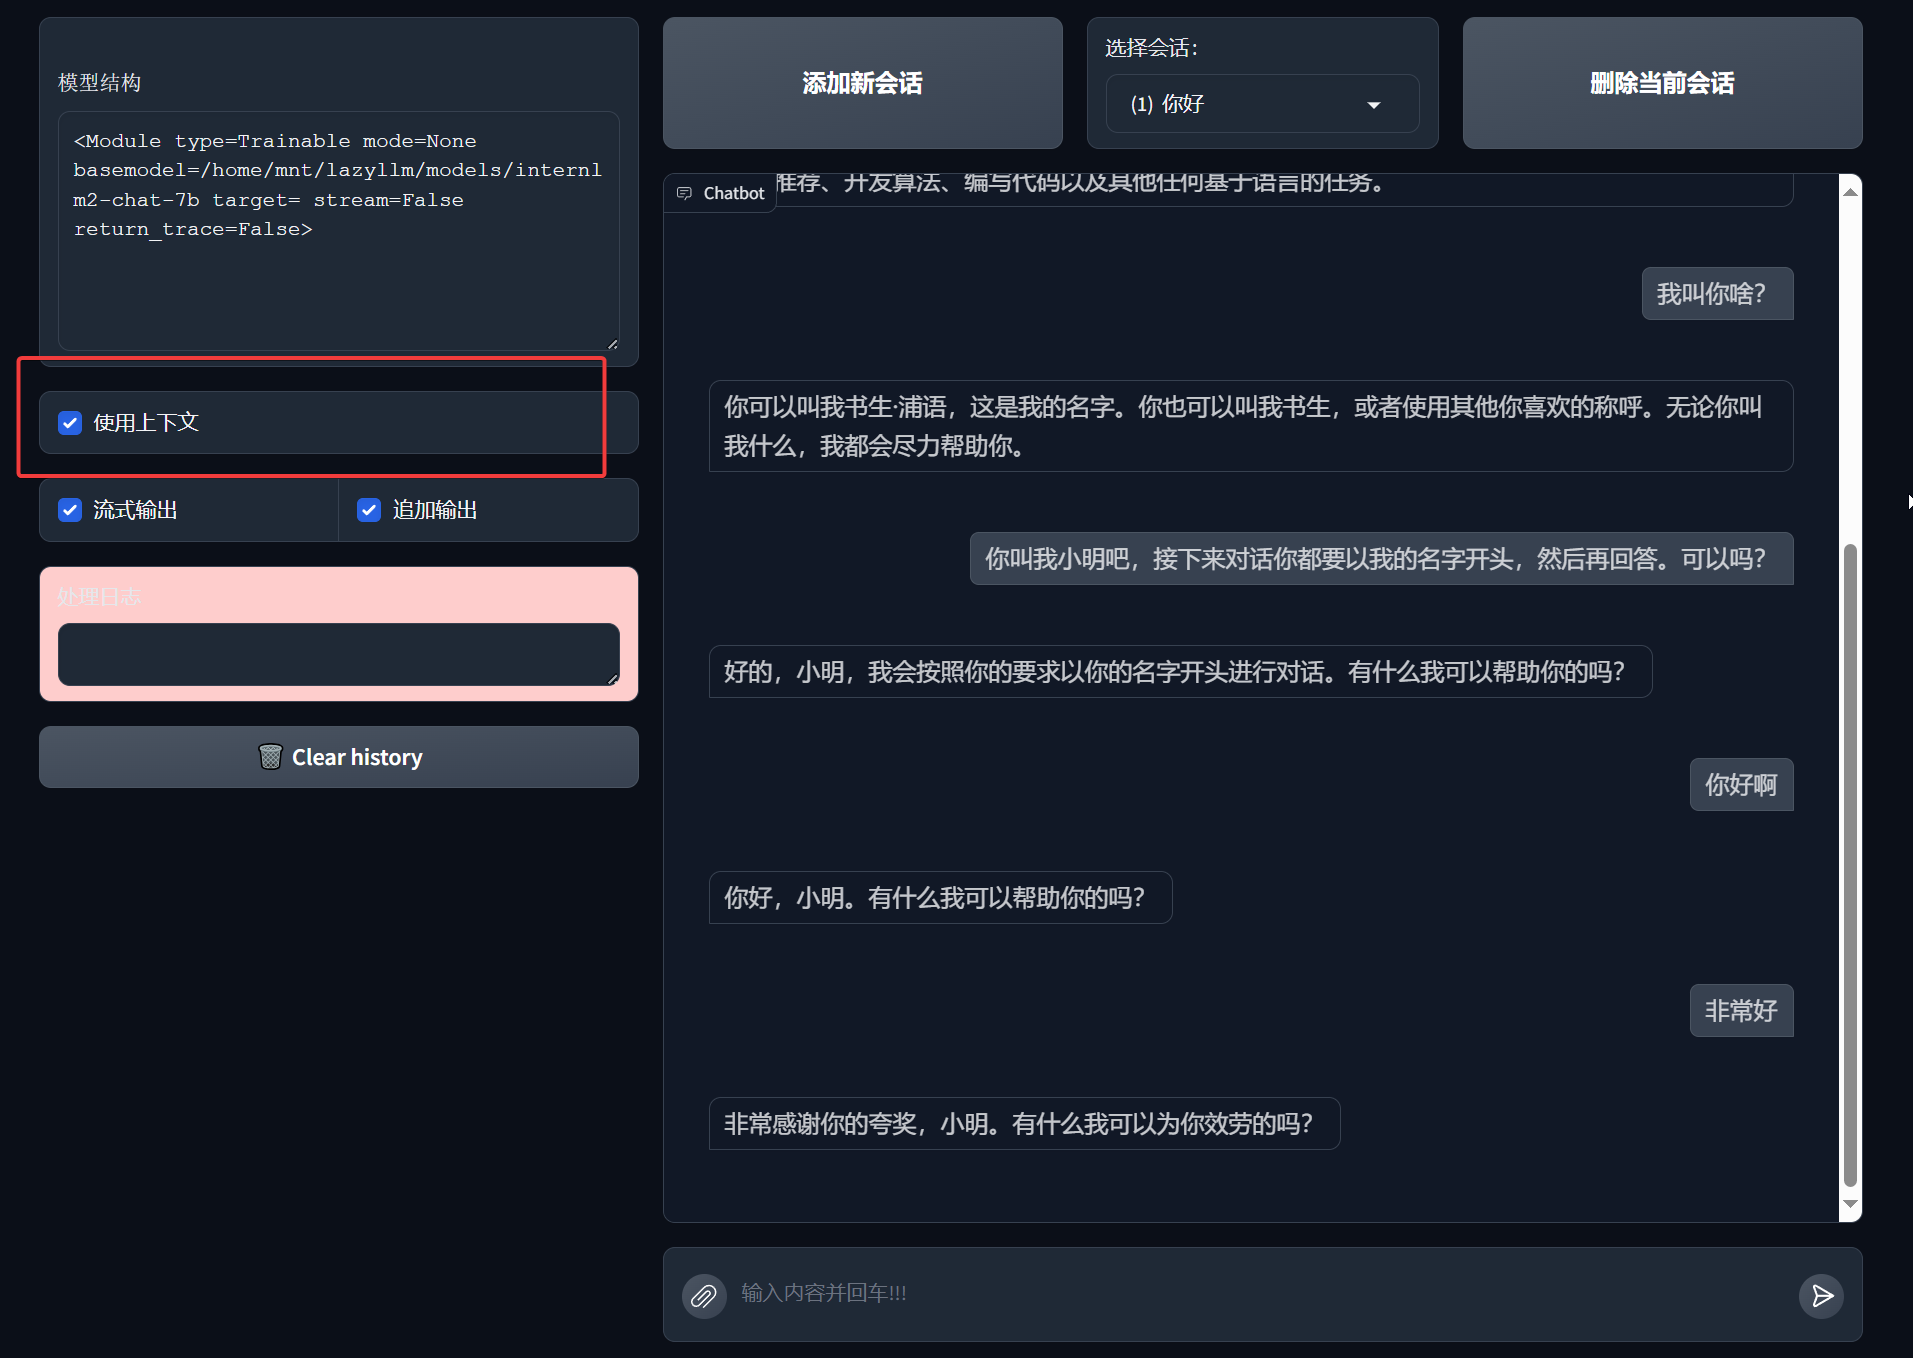
And there you have it, our first chatbot is created! Let's start chatting with it!